Weight Support

The first thing you have to consider in the tripod is how much weight the tripod can support. Most people make a mistake when buying that their tripod only supports a few pounds of weight and it does not support heavy optics.
Due to this, the whole thing will collapse and destroy the camera and lens. You have to make sure that your tripod always wants to support at least 1.5 times more than your camera or lens.
The 1.5 times is the minimum weight limit because choosing the tripod that supports more than the 2x weight limit will provide great stability.
Don’t forget that you will apply some pressure on the camera when using it and sometimes you will place your hand on the setup; it adds more weight on the tripod.
You may also add the battery grip with the scope or the flash with the camera for the potential shoots, which make it heavier, so you have to make sure that the supporting weight of your tripod.
Tripod Construction and Weight
When you are going to choose a tripod, weight is an important thing to consider. You don’t like to have a heavy tripod because a heavy tripod is not suitable to take with you for outdoor use.
The carbon fiber is used to construct lightweight tripods, which are extremely stable, durable, and corrosion-resistant. While the carbon-fiber is an excellent material to manufacture the tripod, but unfortunately, it comes with the highest price tag.
The next best material used to manufacture the tripod is aluminum; this material is heavier than carbon fiber. The tripods at an affordable price are designed by using aluminum.
Nowadays, you can also find the tripods that are constructed by using stainless steel, but the tripods designed using stainless steel are too heavy to use, and also, it is generally used only for video equipment.
When it comes to weight, try to keep the tripod legs’ weight under 5 pounds without a head. The weight of the tripod legs depends on the material that you are used to construct.
The weight of the carbon fiber legs is between 3 to 4 pounds, and the aluminum weights are between 5 to 6 pounds. The weight support of the tripod is based on the size of the tripod. The basalt lava legs come in-between these types in terms of cost and weight.
Tripod Height

When it comes to the height of the tripod, make sure that your tripod is matching your height so that you don’t need to bend down to focus on the view.
Once you set the camera or scope on the tripod, the viewfinder of the optics should be at your eye level. If you choose the tripod higher than your eye level, it is not a problem because you can adjust the tripod leg to make it shorter.
But if you choose the short tripod, you have to bend down at all times, which makes a tiring experience, especially when you are focusing on a specific action.
If you are purchasing a tripod with the head, make sure that the head’s tip is equalizing your jaw level.
If you are purchasing a modular tripod with a separate head, make sure the height of the leg is approximately your shoulder level. Another important thing to consider is the height of the tripod when it is folded for easy travel.
Stability

The heavy tripod does not mean that the tripod has much stability. There are a lot of tripods available in the markets in heavy and durable, but they lack stability when used in different weather conditions.
When the tripod is fully set-up, it has to withstand the wind, and it has to withstand knocks and bumps that accidents might happen in the shooting field.
You have to ensure that your tripod balances that lens to avoid that the optics lean towards one direction. Because this may damage the equipment, if the head of the tripod is not tightened or if the front is overweight than the back, then everything will fall on the ground.
Quick-Release System

Almost every modern camera comes with the thread on the bottom to attach it with the tripod, bipod, or monopod. When attaching the cameras in the tripod, this threading system makes it very inconvenient because you have to rotate the camera or tripod to attach it.
To get the great solution from this problem, the tripod manufacturers came with the great idea- attaching the small removable plates on the optics will help to tightly secure the tripod head.
The affordable tripods come with the plastic plate to attach any lens with the tripod. Some expensive tripods come with the durable plate. Anyhow, the best quick release system is the Arca-swiss Quick Release System.
It is the more or less standard among manufacturers that provides a good solution for the easy and quick operation.
The Arca-Swiss Quick Release System is made of stronger aluminum than the plastic plates that allows to attach the camera or scope on the tripod without any complications.

A quick-release plate is permanently connected with the optics so that you can easily slide into the quick-release clamp. The locking mechanism of the tripod will tighten the optics with the tripod for the vibration-free operation.
The advantage of this system is some manufacturers like Really Right Stuff not only provide plates for the cameras and scopes, you can also replace flash brackets, lens tripod collars, L-brackets, and other accessories for the Arca-Swiss Quick Release System.
The only drawback of the Arca-Swiss Quick Release System is, it is not cheap and also you have to purchase plates for each scope or camera.

Tripod Head
The tripod head is the most important part in the tripod system. This part is responsible for holding the optics safely and control the movement of the optics.
A modular tripod system does not come with the head, so you have to purchase it separately. When you are going to purchase the tripod head, make sure that the tripod head supports almost the same weight that the tripod legs support.
Pan and Tilt Head
The traditional type tripod head is a pan and tilt head. You can easily identify this head by the three control arms extending from the body of the head.

Those arms are used to adjust the head horizontally, vertically, and panning at the same time. Moving the head in one axes is possible by twisting the arms for loosening, repositioning the head, and then tightening the arms.The advantage of using this pan and tilt head is that you can easily use this head, and you can set the precise movement in one axis.
The size is the drawback of this head; it is bulky because of its extending arms. Due to this drawback, you may feel some discomfort in travel. The pan and tilt head is usually used for still-life studio work, landscape photography. Anyhow, these types of heads are used to capture all types of images.
Ball Head
Nowadays, the ball head is the most popular and stylish one. When compared to the other types, it has a high weight capacity, ease of alteration. Due to the part of this ball head, it is compact in size.
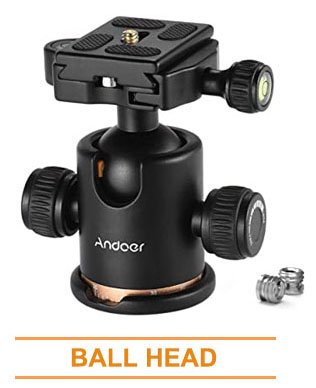 The design of this head looks like a ball is enclosed in a housing with a tightening knob. You can loosen the knob to move the optics in any position.
The dual-control and tri-control design of the ball heads allows the user to control the friction and ball movement by using separate knobs. The tri-control design implements the third knob, which controls 360-degree panning separately from the primary lock.
Due to this ball head’s speed and size, it is the most popular among action, sports, travel, wildlife, and studio photographers. Due to the versatile design, it can be used for all photography applications.
Pistol Grip Head
The variation of the pistol grip head from the ball head, instead of having a knob for tightening the house, a spring-loaded squeeze grip is provided for the holding power.
 You have to squeeze the handle for repositioning the head. Once the scope or head is positioned, you can release the grip and the head will stay in a position.
The benefit of using the pistol grip head is it is very easy to use and easily reposition the head.
But the drawback of using this pistol grip head is, it has a lower weight capacity. Due to the repositioning speed of this head, it is highly recommended for some sports and wildlife photographers.
Gimbal Head
The gimbal heads are specially designed for the large and heavy lens. Due to the shift in the cameras or lens, it combines the center of gravity when using the large lens, the gimbal head is attached to the lens attachment of the tripod, not the camera.
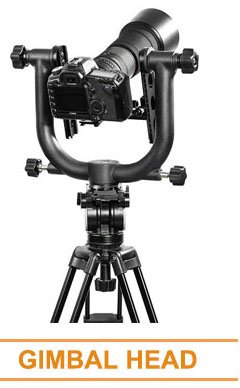 It allows the rapid movement of the lens to quickly identify the object. When you set the camera properly in this gimbal head, the camera will remain steady even if it is not held by the user.
The gimbal head is very heavy and large, but it is a certain type for the large lens camera. Moreover, a specialized mounting plate is required for the large lens.
Due to the design of the gimbal head, it is best for sports and wildlife photography, but it is not a good choice for general imaging.
Geared Head
The geared head is the modified version of pan and tilt head, but a gear system is used to move the head instead of handles that loosen the axis when twisted.
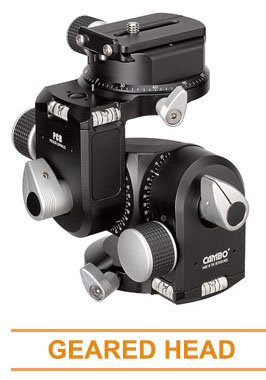 The gearing system of this head allows easy and accurate adjustment; this is the greatest advantage of this head.
The drawback of this head is, these types of heads are weight, complexity and slowly repositioning the head when compared to the other types of head.
Due to the precision built in the geared head, these heads are highly recommended for the architectural photographers and the one who needs an accurate positioning.
Fluid Head
The advanced video functions have in almost every still camera, most of the photographers started to add the video components with their tripod kits. In this list the fluid head is the most essential tool.
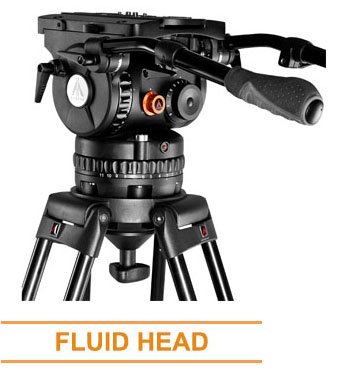 This head is designed to reduce the resistance when recording the video. Due to the design of the fluid head, it allows the smooth tilt and panalong with two axes and the integrated fluid cylinder reduces the unwanted shakes, vibrations, and jitters.
While each tripod head implements the maximum load capacity, the fluid head declares the maximum weight in the guideline, you should not cross that limit.
Proper weight balance is most important in the fluid head for the good performance and to resist the unbalanced load.
Lock Style
Nearly all the tripod manufacturers provide the product that features multiple lock styles for the carbon fiber and aluminum tripods.
The twist lock and flip lock are the two main classic type locks used by most of the manufacturers.
Twist Lock
The twist lock is the most professional lock type; sometimes, it seems tricky to operate because of its inherent advantages. But, it is very easy to use with a little practice.
The “quarter-turn” rule is the key to use the twist lock: almost all the twist-lock requires the quarter turn to open and close the locking mechanism.
This limited movement and the nature of the twist-lock provide the maximum grip throughout the tripod’s lifetime; it does not require any re-tightening.
The twist lock is also easily sealed to prevent moisture from reaching the inner joints of the tripod. The people who like to maintain the tripod by themself, the twist lock is very easy for them to remove and remove the tripod after using it in an unfavorable environment, like dirt, sand, or mud.
Flip Lock
The flip-lock is usually recommended for the amateur, beginners, and enthusiast, because of its rapid set-up time and easy use function.
These types of locks are designed with a simple mechanism, which is “flips” so that the user can simply flip to the lock open for extending the lock and then flips the lock close to protect the leg section.
The result of the flip lock is very fast and also it has a simple set-up process. Even though, today’s latest flip locks are very adjustable and long-lasting.
All the flip locks require retightening and it is not weather-sealed to protect the tripod against debris and moisture.
Chassis or Spider
The chassis is the top of the tripod, where the leg is connected. It forms the platform to mount the head or it assists to surround the center column of the tripod.
Some chassis design allows the direct mounting of the tripod heads by interchangeable center plate feature, which allows to add the optional center column or other mounting systems.
Usually, the chassis is made of some types of metal alloy. The tripod without the telescoping center column chassis will gain the maximum stability.
Center Column
The center column of the tripod is mounted to the chassis, or it allows it to slide for extending the height of the tripod even longer than the leg.
Most of the center columns are reversible that allows you to mount the camera below the chassis for the low-to-the-ground shots. Most of the center columns have the grip collar, which keeps them in place until you extend them.
Some center columns have the geared system; you can leverage the bar to raise or lower the column by using this. Generally, the crank system is featured in the sturdy-duty or studio tripod because the center column adds reasonable weight to the tripod system.
Tripod Feet
When choosing the tripod, the feet of the tripod is one the important things to consider. Here we review some basic designs with their advantages.
The rubber-tipped feet are very friendlier to the floor. If you are going to choose the tripod for indoor use, especially for the wooden and tile floor, the rubber-tipped feet are a good choice.
Some tripods are designed with metal spiked feet, which provides a solid grip on the outdoor surface. The metal spiked feet provide good grip in the soft dirt to the rock.
Nowadays, most of the tripods are designed with the replaceable tripod feet to use in the different environmental conditions, which means you just screw the foot in one way to have the rubber foot and screw it in another way to have the metal spiked foot.
These things will go wrong in the cheaper brand tripod legs- the rubber feet will fall off, and you are just left with the spikes. This is one of the main reasons to buy a high-quality tripod, even if you are choosing only with the rubber feet or the metal spiked feet.
Some tripods are designed with special feet, like sharp claws to get a solid grip in rocks, sands, or snow.
Tripod Legs
Usually, tripod legs come in two forms: tubular and non-tubular. The tripod legs designed by using the carbon fiber come in tubular form and also it has the threaded twist-lock system to protect the legs.
The tripod designed by using the steel, casalt, and aluminum has the non-tubular form with the flip-lock to protect the legs.
The tripod legs usually come between 3 to 5 leg sections and the legs section also depends on the height of the tripod. The tripod with more leg section is literally less stable.
Release the tripod legs
The first step of the tripod set up is you have to properly extend the tripod legs. The best way of doing this is to always extend the tripod from the top down rather than extending from the bottom leg section.
Which means, using the wider diameter upper-leg than the thinner lower leg will provide more stability to the tripod. 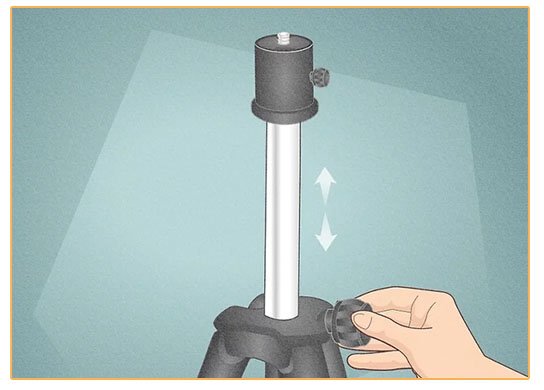
In the next step, release each leg based on the height that you need; it is better to extend all the legs to their maximum height rather than using the center column to get the height you need.
Positioning the tripod legs
Once you extend the tripod in its full height, you need to position the tripod legs on the ground. In this case, you don’t need to worry about the tripod not being level.
You can adjust the length of the tripod a bit to accommodate the tripod. If you are planning to place the tripod on the ground, make sure that one leg of the tripod is pointing in the lens direction once the optics are attached to the tripod.
Another two tripod legs should be positioned so that you can stand between them. The tripod positioning ensures a solid balance once you mount the optics on the tripod-especially if you are using the large lens.
Get the tripod level
The recent model tripods come with the bubble level, and it will help you to find which leg will need adjustment. 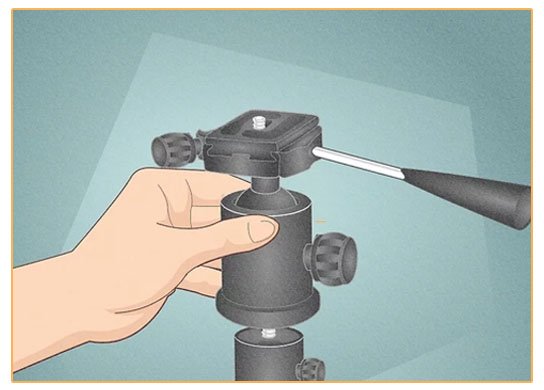
Starting the adjustment from the lower leg section for leveling the base plate body of the tripod
Attach your optics on the tripod
Now the body of the tripod is level to attach the optics. Each tripod comes with the base plate, which is attached to the tripod head top-plate.
The tripod’s base plate is designed with the quarter-inch thread that helps to directly lock the base of the optics with a tripod. 
When attaching the optics with the tripod, you have to make sure the plate of the tripod is perfectly attached; you can use a coin on the screw if you need to apply more torque.
Now place the optics on the top of the tripod head and finally use the tripod head adjustment to level out for better focus.