Mounting a new Rifle Scope properly is very important. Precision is the most important thing when using a rifle scope.
So, if it’s not done properly you will struggle with finding the right position, or you may have the chance of missing your shots.
Buying an expensive scope and it’s mounted poorly, then it’s useless. Some shooters or hunters pay gunsmiths to mount their scope, but the thing is that anyone can mount their scopes without any fear of ruining the precision of your riflescope.
Knowing how to mount your rifle scope also means you can fit it to your exact measurements.
Usually, mounting a rifle scope is not difficult, with the right tools and little patience, you can mount your scope properly. And here’s an article that will help you know the complete guide to mounting a rifle scope.
Tools Needed
- Scope
- Rifle
- Scope mounting base
- Scope Rings
- Degreaser
- Gun oil
- Screw Driver
- Allen Wrench or Torx Wrench
- Small level
- Removable Threadlocker
Step by Step process for mounting a Rifle Scope
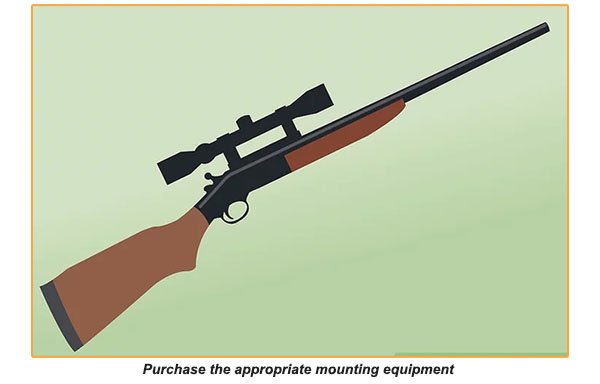
1. Get the Right Tools
The very first step in installing your scope is to prepare your rifle scope to accept the mounting of the scope and be certain that you have the proper bases, rings, optics, and tools. Choose the scope with the magnification level, which is good for you.
Before you start the mounting process in scope, use a good degreasing agent to clean all the screw holes, screws, contact surfaces, rings, and bases.
It is highly advisable to wear gloves and eye protection whenever working with these harsh solvents. Always make sure that your firearm is unloaded.
Remove any filler screws at the top of your receiver with a properly fitting screwdriver, and you will have access to degrease each screw hole.
Always use a correct sized screwdriver to remove the screws and use the screwdrivers that are made for the gun work.
Also, check those screws have a parallel ground blade or hollow ground blade. It’s highly recommended to prefer the Allen wrench or Torque wrench to fit the screws for your mounting system.
After cleaning your rifle, secure it in a lead sled or other devices while installing the scope.
When securing, it is also needed to go ahead and level your rifle. For this step, you need a short level so that you can typically find it in any small tool kit.
2. Mount the Bases
Mount the bases over the mounting holes of the rifle. Also, make sure that the distance between the rings is not greater than the tube length of the scope.
Tighten each screw individually, making sure to see that the screw will tighten the base until you can’t move it.
Gently tighten the screws in an alternative pattern and tighten both rings at the same time. This ensures that the screws are properly seated when tightened.
3. Tighten Screws
Before installing the scope base to your rifle, apply a drop of gun oil or thread locker liquid on the contact surfaces.
This will prevent rusting between the receiver and scope base. Moreover, the thread locker liquid acts as a lubricant and allows you to apply more pressure than required when tightening the screw.
Remember that the screws shouldn’t be over tighten to avoid thread deforming.
To apply uniform pressure on each base, place the four screws, and alternately tighten one screw and then another.
4. Installing Rings
Screw the bottom half of the rings onto the bases. Next, rotate both rings so that you can be able to insert a cylindrical object or hardwood dowel between them.
If you are using a Picatinny rail or weaver system, you have to tighten them with a proper sized wrench or a screwdriver.
Or else, if you are using a Leupold turn-in style, then you have to set up the top half of the ring to the bottom, place it in a base.
Using a wooden dowel or non-marring screwdriver handle turns the ring to 90 degrees. This method is a press fit, and it can’t be done by hand.
On a dual dovetail turn-in type ring, add some lubricating grease to the dovetail before installing the ring. Never use the scope to turn the ring into place.
For an alternative, you can use a rod that is the same diameter as the body of the scope or ring wrench.
It is not recommended to use your new scope to align the rings because its surface may tend to scratch easily.
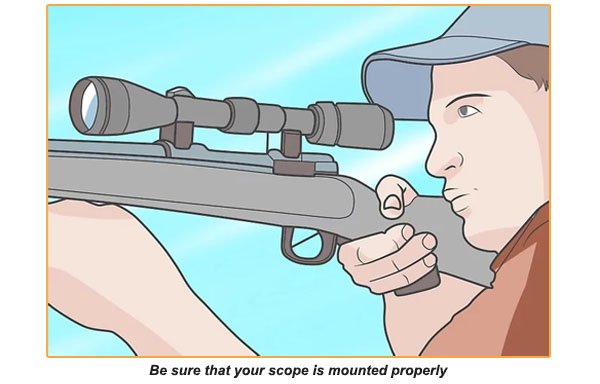
5. Set the scope in place
Once you align the rings, set the scope in place. Then to fix the scope, place the upper halves of the rings, but don’t tighten the screws completely.
To align the crosshair, use two bubble levels. For this place a level on the reticle and another level on the action of the rifle.
Gently move the rifle and scope until the bubble on both levels stops in the middle of the tube.
Next, tighten the screws until there’s a little drag on each scope and allow the scope to move forward and back. Each time you adjust, check the eye relief until the eye relief is correct for you.
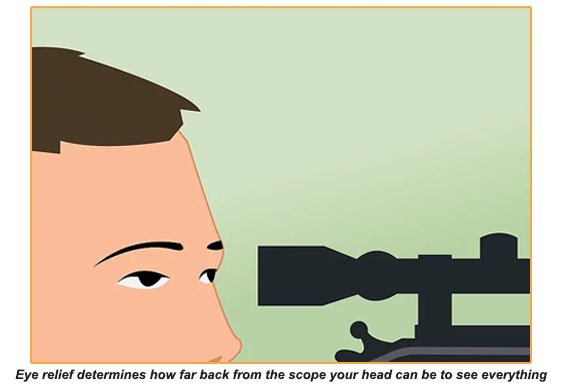
For a varying scope, check it at both ends of the power spectrum. While looking through the scope, place the rifle on your shoulder and keep your eye wide open. To get a crystal clear view of the target, glide the scope between the rings to a position.
Once your scope is in the correct position, then move the scope one inch forward. To adjust the eye relief, moving the scope forward and backward is necessary. Moreover, this may not hurt your eye in case of recoil.
Eye relief is simply the distance from our eyes to the field of view. It’s to make sure that our eyes are at a safe distance from the edge of the scope without compromising the preferred field of view.
6. Align The Reticle
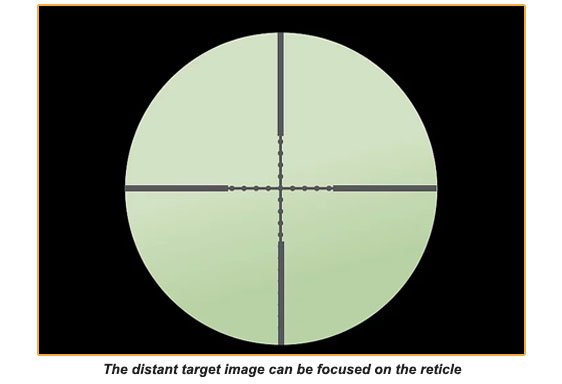
Aligning the reticle is one of the difficult parts of mounting a rifle scope so that it’s square to the bore of the rifle.
This reticle is the aiming point or crosshair in your FOV in a riflescope. To focus on your reticle properly, first, you must focus on your eye.
When you are looking through the scope, the reticle focus impacts how crisp the reticle image appears.
Here’s one of the simplest ways, which is to hang a plumb bob a few distances from the working area, then lock the gun vise or hold the device, so it is at a perfect level. Then align the vertical crosshair with the plumb bob line.
Also, you can use a large cardboard box when you don’t have a gun. For this, cut a deep V on each side and place the rifle scope in it.
Set the level on a flat surface like a scope or rail mount base and twirl the rifle until it reaches its level.
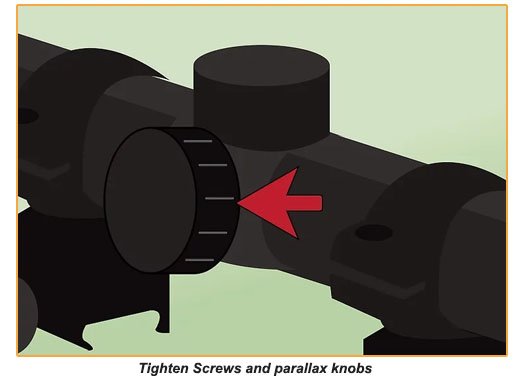
7. Tighten The Ring Screws
Once the reticle is aligned and the eye relief is correct, tighten the screws firmly in an alternating pattern, left to right, and back and forth.
Make sure that the screws are tight and nothing moves during the tightening process.
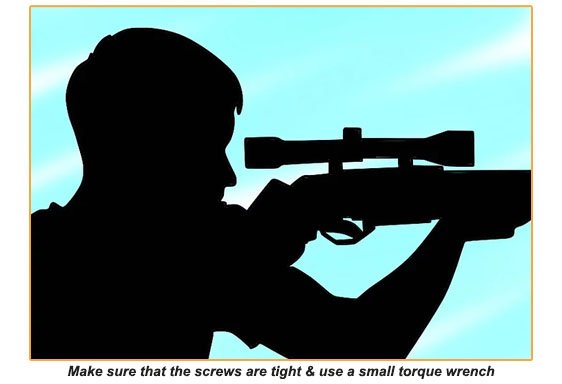
Apply enough pressure on the screws and use a small torque wrench for maximum precision.
8. Ocular Focus And Sighting In Your Scope
Adjusting Bore-sight is an important thing here. By using a proper insertion pin, insert the boresight.
It is done by removing the bolt of an action rifle. Then adjust the horizontal and vertical axis of the scope to your desired point of aim.
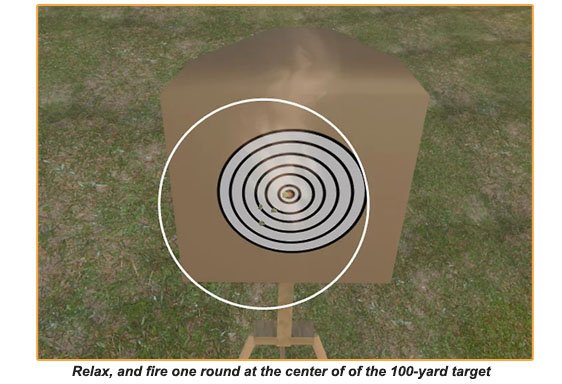
If your first shot strikes near the target, then your calibration is great. In different circumstances, make the required adjustments and move 100 yards away from your target and repeat the same process.
Before starting to aim at your target, always check your rifle’s stability and range.
Practical Tips
- Read the user manual carefully before applying the thread locker liquid on each of the screws. Most of the manufacturers have recommended not to apply any adhesives on the threads because sometimes it becomes very tough to detach.
- Before attaching, it’s highly advisable to use isopropyl rubbing alcohol to clean the receiver or rail, rings, screws, and bases before mounting. It doesn’t require any oil in or on your scope mounting system.
- It’s recommended to use a gun vise to keep your rifle secure while mounting the scope.
- Usually, metal gun vises are good because they are more resistant and firm than plastic models.
- Adjust your tools by following the instructions suggested in the user manual.
- While using laser bore sighting, it’s highly advisable to keep your eyes at safe distance or away from direct contact with laser light.
- Make sure that you have removed the laser from the scope before shooting.
Conclusion
Hope this article has helped you to know how to mount a rifle, and now you can hit the field without any issues. Moreover, you will be able to have a good shooting experience.
Be careful on mounting a rifle and not to mount a rifle scope wrongly because it may keep you struggling when shooting. Once you mount a few scopes, you will get clear knowledge and realize how quick and simple it is. You just need to select the right tools and use the following tips to get better results. Good-luck with your newly mounted scope!